Creating a custom library in Cadence
In order to use schematic symbols imported from the web or custom created for your project (very common), you must create a custom symbol library in which to save them. It is good practice to create a custom library for each project that you work on to save your schematic symbols. To create a custom library, do the following:
-
With your project open, choose “File > New > Library”. This will create a new library with a default name under Design Resources in the project.
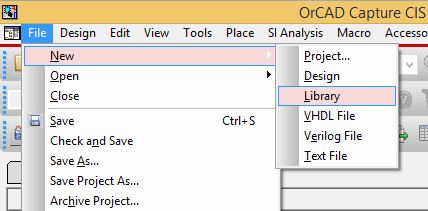 Figure 1
 -
Right-click on the new library and choose “Save As…” You will be prompted to enter a name and choose a location for the custom library. Save the custom library in the same folder as your project files.
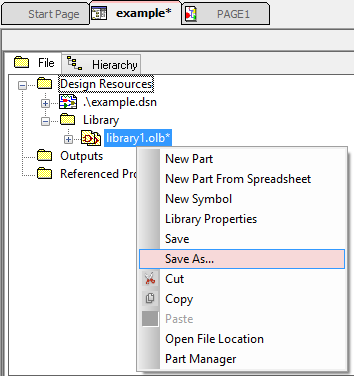 Figure 2
 -
Add the custom library to your project by clicking the “Place Part” tool in the toolbar. Then, click the “Add Library” button (which looks like a dotted square with a yellow corner) and locate the library file that you saved in the previous step (it will likely be in a different location than the pre-installed libraries). Click “Open” to add the library to the list of active libraries.
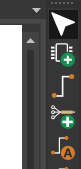 Figure 3: Toolbar with Add Part button
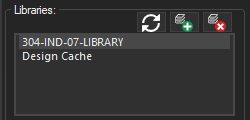 Figure 4: Add Library button (document icon with green plus sign)
 -
To create a new part in the custom library, right-click on the library and choose “New Part”. More information on creating custom parts can be found on the Creating a Custom Schematic Symbol in Cadence page.
Based on a tutorial by Cody Van Cleve