Configuring the UART on PSoC
What is a UART (Universal Asynchronous Receiver/Transmitter)?
UART is one serial protocol used for communicating data between two digital devices (e.g., between the Pioneer Kit and the computer).
When is a UART useful?
Some sensors (e.g., GPS and RFID units) have a UART interface. Additionally, it is very helpful for debugging programs by using it to send messages back to the computer indicating the current status of the program.
How does a UART work?
More information on UARTs is available in the Microcontroller UART Tutorial from Society of Robots.
How many PSoC chips does the PSoC 4 Pioneer Kit have?
See the PSoC Hardware Development Kits page. This is important to understand the answer to the next question.
How do I connect and configure the PSoC 4 Pioneer Kit to send information to the computer over the UART?
-
On the Pioneer Kit, connect a jumper wire from UART RX (P04) of the PSoC 4 to J8_10 (P12[7]) of the PSoC 5LP
-
On the Pioneer Kit, connect a second jumper wire from UART TX (P0[5]) of the PSoC 4 to J8_9 (P12[6]) of the PSoC 5LP
-
Connect the Pioneer Kit to your computer with a USB cable.
Next, you will need to determine which COM port the Pioneer Kit is connected to, install a terminal program, and configure it to read data from the serial port on your computer. This will allow you to see the output from your program.
-
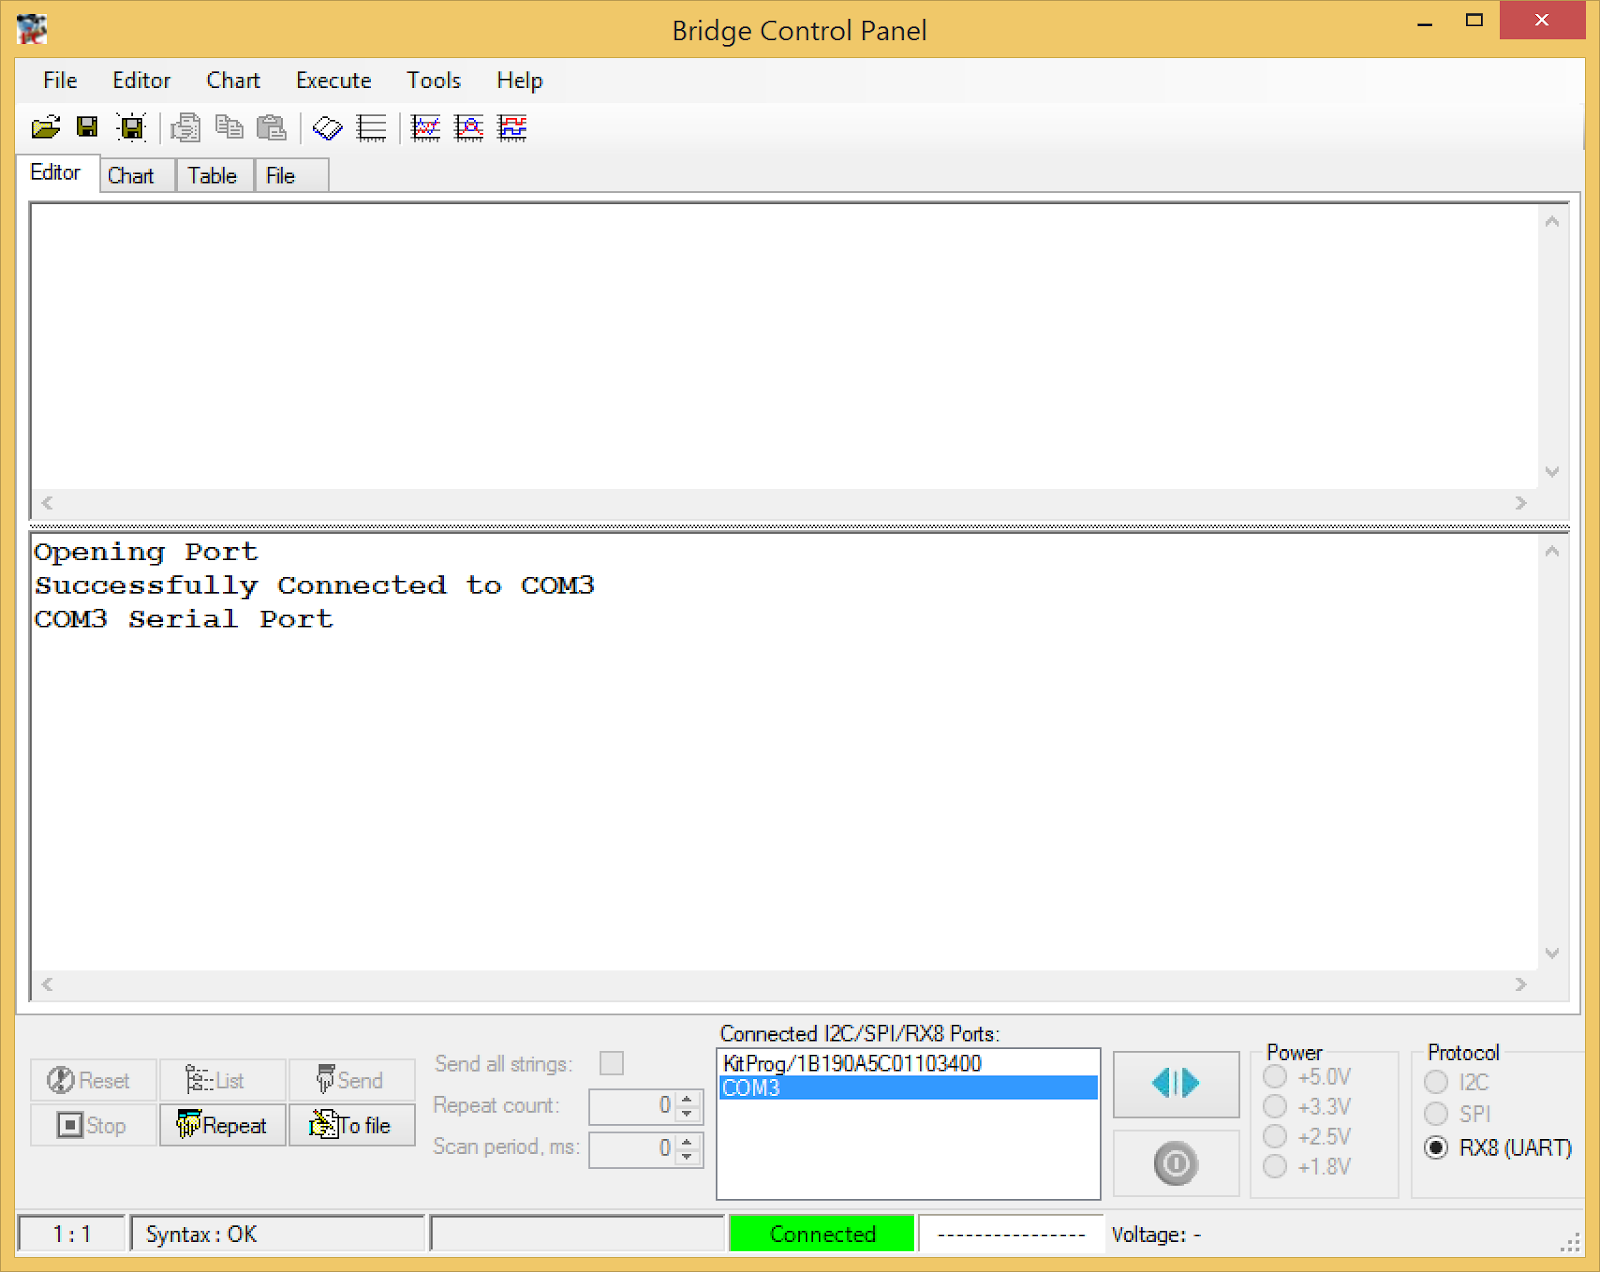
Determine which COM port the Pioneer Kit is connected to by opening the Bridge Control Panel application in the Cypress folder in the Start menu, and looking for the COM port listed with the highest number (see Figure 2, below). Write down this port name and close the Bridge Control Panel.
Figure 2: Bride Control Panel -
Download, install, and open the terminal program PuTTY
-
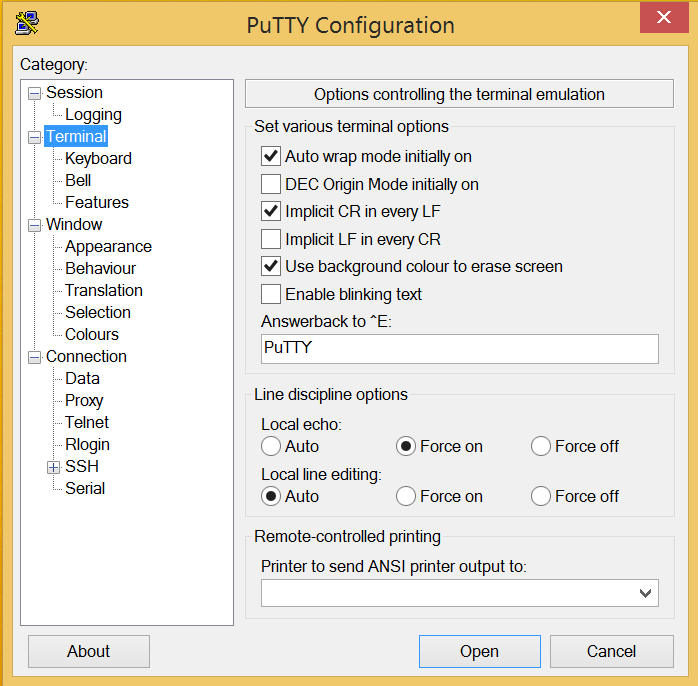
Click on the Terminal tab and configure it with the settings shown in Figure 3 (below)
Figure 3: PuTTY terminal configuration tab -
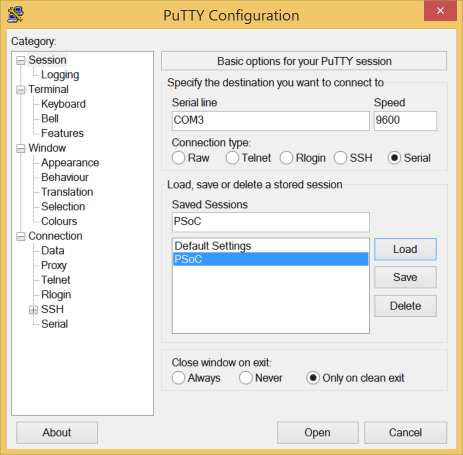
Click on the Session tab and configure it with the settings shown in Figure 4. Use the COM port for your computer determined earlier in this tutorial. Save the session as PSoC and click “Open”.
Figure 4: PuTTY Session configuration tab -
Finished! Now, you can see text sent between your computer and PSoC 4 Pioneer Kit via the UART.


